A few months into the COVID work from home era, it was time to upgrade my home network setup. Part of this project would involve running Ethernet to my home office and adding multiple wireless APs throughout the house for improved 5GHz coverage, but I was most attracted to using this as an opportinity to move my various IoT devices to their own subnet.
The process of getting my chromecast devices to work from the IoT network was not difficult, but it did take a good deal of research before I found an appropriate solution. I wrote this post to maybe help a few others who are looking to use chromecast devices when on a different subnet and still have access to speaker groups.
Background
Just to give the walkthrough a bit more context, here is a brief summary of my equipment and network as it was configured from the beginning:
- Protectli Firewall Micro Appliance - running pfsense 2.4.5-RELEASE-p1
- UniFi nanoHD (2 APs)
- UniFi PoE Managed Switch
- Raspberry Pi 4 running as my UniFi Controller
Netgate provides great Pfsense documentation and within a matter of minutes I had created a network for my Trusted devices and a VLAN for my IoT devices.
| Name | Network | Firewall Rule Description |
|---|---|---|
| Trusted | 192.168.8.0/24 | Allow devices on the Trusted network through the WAN; allow access to the IoT network. |
| IoT | 192.168.16.0/24 | Allow devices on the IoT network through the WAN; block them from accessing the trusted network. |
I then created an IoT and Trusted SSID for the repsective networks and proceeded to connect all IoT devices to the IoT network, and all trusted devices to the Trusted network.
At this point in the process my smart speakers worked when spoken to, but I was not able to cast media from my phone or computer to any of my chromecast devices while connected to the Trusted network. Obviously, this was expected behavior as there was no way for Chromecast devices to communicate with devices on the Trusted network.
Walkthrough
The steps below assume at least a little familiarity with pfsense and Linux systems.
Chromecast devices depend on the mDNS protocol to discover and communicate with other devices on the same network. In order to allow devices from the trusted network to discover and communicate with Chromecast devices (connected to the IoT network) some traffic needs to traverse between networks.
Add firewall rules for the following prootcols/ports for traffic originating from your IoT network destined for the Trusted network:
| Protocol | Port | Source | Dest. |
|---|---|---|---|
| TCP | 5556 | IoT |
Trusted |
| TCP | 5558 | IoT |
Trusted |
| TCP | 8008 | IoT |
Trusted |
| UDP | 5353 | IoT |
Trusted |
| UDP | 1900 | IoT |
Trusted |
UDP Relay
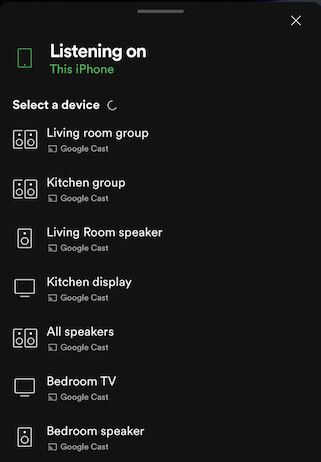
The next step is to setup a UDP Relay that can repeat mDNS trafic across subnets. The relay is needed in order to allow speaker groups to be seen by iOS and Android devices as they require broadcasts to originate from an address on the same subnet.
If you're not concerned about speaker groups, install and configure the Avahi package and call it a day, otherwise continue on.
Housekeeping
- Enable SSH from your pfsense dashboard: System --> Advanced --> Enable Secure Shell. If you're not familiar with ssh keys, select Password or Publick Key from the SSHd Key Only dropdown.
- Make sure that you're allowing connection to port 22 in your firewall rules.
- From the pfsense Package Manger, install the Shellcmd package - this will be used to start the udp relay service at boot.
- Navigate to Interfaces --> Assignments and make note of the adapter name for the interfaces that correspond with your IoT and Trusted Networks. Also note the VLAN tag if applicable. In my case the these were em2 and VLAN 20 on em2
Installing updbroadcastrely
- SSH into your pfsense box
# Download the package from official
pkg add https://pkg.freebsd.org/FreeBSD:12:amd64/quarterly/All/udpbroadcastrelay-0.3.b.pkg

# Recompute the binary locations
rehash

# Show package information
pkg info udpbroadcastrelay

# Verify where the binary is located, should be in /usr/local/sbin
which udpbroadcastrelay
Build updbroadcastrely from source [NO LONGER REQUIRED]
I'm leaving these build steps here in the even someone needs them, but these were written before the package was available from freebsd.org.
pfsense doesn't include make files needed to compile packages from source. If you'd like to build you're own package you'll need to spin up a FreeBSD virtual machine and build it from there.
Build Environment
- Use Virtual Box for your VM software, or whatever else you prefer
- Grab the FreeBSD 11.4 ISO (assuming you're running pfsense 2.4.5) NOTE: this links to the AMD64 architecture for Intel/AMD processors
- Create a new VM within Virtual Box and point it to boot from the FreeBSD ISO
- When FreeBSD boots, login with the username root then enter the following commands to install necessary packages and build the binary:
pkg update # update repos
pkg install git # install git
git clone https://github.com/marjohn56/udpbroadcastrelay.git # clone the repo
cd udpbroadcastrelay # change into the build directory
make # build the package
You now need transfer the udpbroadcastrelay binary file you just built to your pfsense box. This can be accomplished with the following rsync command, replacing kermit with your pfsense username, and 192.168.8.1 with the IP address of your pfsense router.
If prompted for a password, enter the password of your pfsense user.
rsync -aP /root/udpbroadcastrelay/udpbroadcastrelay kermit@192.168.8.1:~/
Assuming there weren't any errors, the udpbroadcastrelay binary should now exist in the home folder of your pfsense user.
Starting udpbroadcastrely
- From the pfsense dashboard, select Services --> Shellcmd
- Click the + ADD button.
- Enter the following in the Command field, replacing
kermitwith your pfsense username andem2andem2.20with your interface devices.
/usr/bin/nohup /home/kermit/udpbroadcastrelay --id 1 --port 5353 --dev em2 --dev em2.20 --multicast 224.0.0.251 -s 1.1.1.1 -f > /dev/null
- Select shellcmd from the Shellcmd Type dropdown.
- Enter a Description for the command.
- Reboot the pfsense router to start the service.
Upon reboot you should be able to cast media to video and audio enabled chromecast devices AND see speaker groups!
